
Getting started
Make your first video
A complete path from an empty project to your first exported scene.
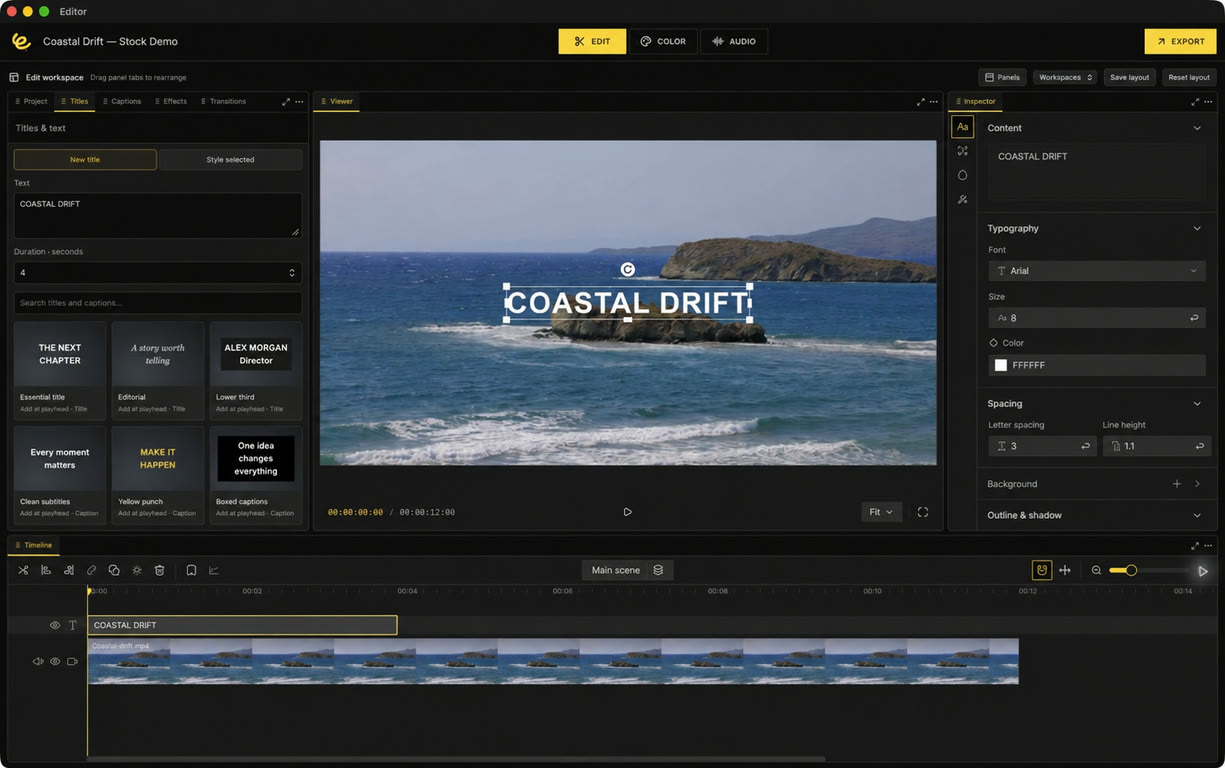
Start with a small project#
Open Editor and create a project from the project screen. A project holds your scenes and media. For a first edit, use a few short video files, an image, and an audio track. Set the canvas and frame rate in the project's settings before building the sequence.
Build the story#
- In Edit, use Project → Media to import your footage.
- Add media to the Timeline. Arrange clips in the order you want and use additional tracks for overlays and sound.
- Move the playhead and press Space to preview. Select a clip and drag its edges to trim it.
- Use Split at the playhead to create a cut. Remove the unwanted part and check the join.
- Open Titles, enter your text and a duration, and choose a style. Select the title to adjust its appearance in Inspector.
Finish picture and sound#
Use Color for exposure, balance, and a consistent look across shots. Use Audio to balance the track levels and add fades. Start with small adjustments and compare with the original. A visual transition does not create an audio crossfade; audio fades have separate controls.
Export the current scene#
Choose Export in the header. Start with MP4 and H.264 when your device supports it. Choose your resolution, frame rate, quality, and whether to include audio. Export the full scene or a custom range, then play the saved file to review the result.
Export covers the current scene. It does not automatically combine every scene in a project. For the next steps, read Timeline essentials and Video export settings.