
Audio & mixing
Mix tracks in the Audio workspace
Balance faders, pan, mute, solo, and effects across a scene.
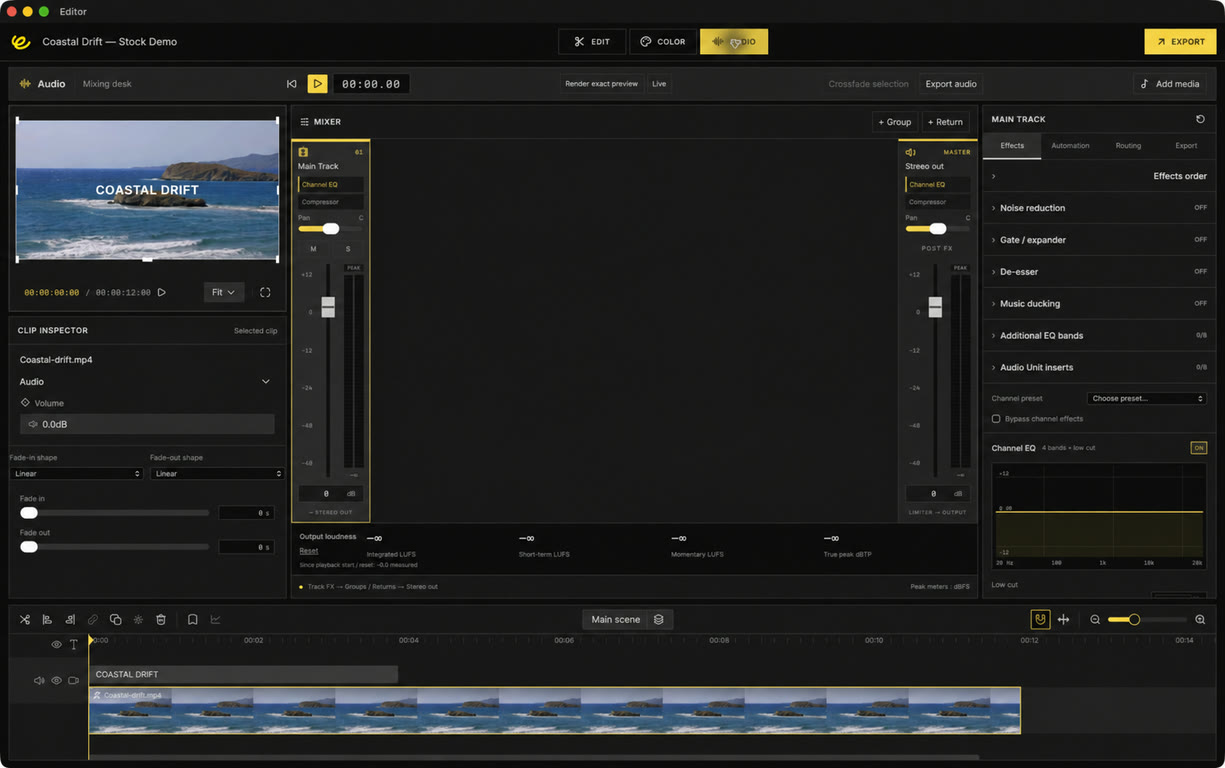
Open the mixer#
Choose Audio beside Edit and Color. The desk uses the project's video and audio tracks. Tracks, groups, returns, and stereo output each have a fader and pan control. Changes to effects, routing, automation, and buses save with the scene and use undo/redo.
Set a balance#
- Play a representative section and start with dialogue or the main sound.
- Bring music and other tracks up around it.
- Use pan to place sound across the stereo image.
- Mute a track to remove it from playback and export, or solo the material you need to inspect.
Soloing a group includes its members. Muting a track also suppresses its sends. The master monitoring volume and the rendered mix level have different roles; use output loudness measurements to assess the signal being delivered.
Shape a channel#
Effects includes EQ, compression, reverb, delay, and optional cleanup controls. Effects order changes the real processing chain. For example, putting reverb before a compressor can produce a different result from compressing the dry signal first.
Additional EQ bands adds up to eight individually enabled parametric, shelf, low/high-pass, or notch filters. Set frequency, gain, and Q while checking the response plot, then compare at a similar perceived level.
Live or exact preview#
Live is responsive while editing. Render exact preview creates a continuous full mix with three seconds of extra tails so seeking preserves effect history. Re-render after changing the mix. See Loudness and exact preview.